
If you are following developments in fields like IoT, AI, machine learning and so on, you may have heard of these buzzwords – Bluemix, Watson, cognitive computing and so on. When I first heard about them , I thought they are some high-end computing technologies and nothing to do with the toys like Raspberry Pi or mbed (well, the powerful toys). As I went on exploring, that initial reaction faded and I realized that these offerings from IBM are significant enablers to the IoT systems and have many powerful features. I have just recently started experimenting with these and thought to share the journey with you.
This is the first post on this topic and I plan to cover various features of Watson gradually in future. This post shall help you understand the basics of applying IBM’s cloud offering and other services to IoT using a Raspberry Pi and make an entry in the World of Watson.
IBM Bluemix, Watson are slightly complicated to get started with but once the fundamentals are clear, it is fun to play with. There are a number of articles and guides on IBM developerworks though but this post aims at a basic example from scratch. It is assumed that you have basic knowledge of Raspberry Pi. To keep things simple, we will only send some data from the Raspberry Pi to IBM watson service and visualize the data on the cloud. We will not send data in the other direction (i.e. from Watson to Pi).
To avoid a lengthy post, I have split it up into two parts. In the first part, we will understand the basics, setup IBM Bluemix platform and start a Watson IoT service on it. In the second part, we will cover setting up Raspberry Pi and create a Node-RED app on it to send data to the Watson IoT service and also visualize the data on IBM platform. This is the first part.
What is Bluemix and what is Watson?
In a nutshell, Bluemix is IBM’s cloud offering. It hosts a number of services, apps and provides infrastructure services like storage space and a lot more. The services include analytics, dedicated services for IoT and the most significant Watson services.
Watson is a set of powerful services like visual recognition, speech to text, text to speech, natural language processing and adds cognitive computing abilities to your product. It can help you understand and analyze your data which can be simply numbers or text or even images, audio and video as well. You can also create chatbots with Watson and let it communicate with users in a natural language. In short, Watson is a highly powerful machine learning framework.
The Bluemix platform also has third party integrations such as flowthings, pubnub etc. More services and features keep getting added. You can find out more details and try a demo of Watson services here.
Let’s get started now. We will carry out the following tasks.
Set up IBM Bluemix
First thing to do with any cloud service is create a login. Follow this link to create your Bluemix account. This creates a trial account which is free to use for 30 days. After 30 days, you need to provide credit card details so any data usage over and above free limits gets charged to your card. Don’t worry, many of the apps/services on Bluemix have some free data usage so if you don’t exceed the limit you won’t be charged.

Enter all your details such as your name, email ID, phone number, country and so on. Needless to mention, choose a strong password. Once you complete the registration, you will receive a verification email on the email ID you provided. Confirm your email ID by following instructions in the email and your account will be activated. Without this step, you will not be able to login to your Bluemix account.
After the email veirfication is completed, log in to your account. There are a couple more formalities to be done.
- Add an organization name. An organization can have multiple services, apps under it. You can view this as a project or group of projects.
- Add name for a space. Space is like an area under which your apps, services operate and access permissions, resources can be managed. You can have a development space, production space, testing space and so on. More spaces can be added later.
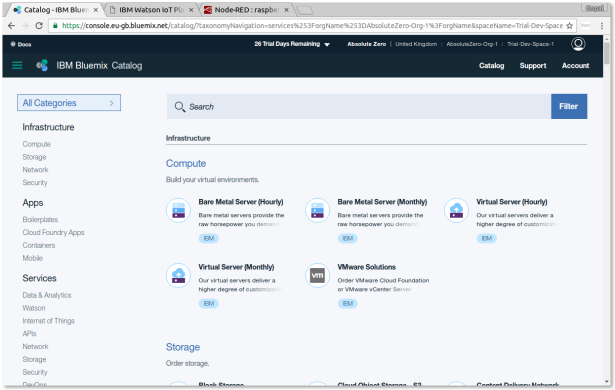
Once you are done with this, click on “I’m Ready” and you will be presented the opening page which shows IBM Bluexmix Catalog. You are now ready to create service or app in your Bluemix platform.
From the catalog page, click on “Internet of Things” under “Services” category. This will list all IoT related services available. If you don’t see the “Internet of Things platform” service on your page, it is probably because the region selected is Sydney. For some unkown reason, this service isn’t shown for Sydney region. In that case, click on the country shown in upper right corner of the window and change the region to either US-South or United Kingdom.

There are various services available for IoT including some third party plugins. Let’s focus on a basic service “Internet of Things Platform”. Click on it and you will be taken to the next screen to create this service for you.

Give some name to this service. Leave the drop down box for “Connect to:” in its default state “Leave unbound”. This connection is required later when the service needs to be connected to an app. Click on “Create” button now. The service will be created and a welcome screen will be shown.

As you can see on this screen, there are 3 tabs in the upper section of the page – Manage, Plan and Connections.
In the ‘Plan’ section, you can view your pricing plan for this service. By default Bluemix allocates a standard plan for this service. You may change your plan from here but not all plan changes are supported by IBM. Also, a plan change may require additional actions like restaging application etc. Don’t worry about it for now.
In the ‘Connections’ section, currently nothing will be shown as we haven’t connected our service to any app or other service. When we create an app from withing Bluemix to consume data received by our service, we need to connect the service to that app. Again, don’t worry if this is not clear. We are not going to need it until we go into advanced apps and services.
You can also see 3 columns there. “Connect your devices”, “Learn how to build your app” and “Learn how to extend your app”. The first one “Connect your devices” is of our interest and we will come to it in a while. The other two are pointers to building app from within Bluemix and adding more features to it. Again, we are not going to use these so don’t worry about it.
At this point, you have successfully started the Watson IoT platform service. Its time now to tell Watson what devices you will be connecting to it.
Add Device to the Watson IoT platform
Before adding a device, a device type needs to be created. This is a one time activity after which we can add as many devices of a particular type. Essentially, device type is like a template for new devices to be added.
Create Device type
From the ‘Manage’ section shown on the welcome screen (shown above), click on the button ‘Launch dashboard’ in column ‘Manage your devices’.

The initial screen shows something called as boards. These are data analytics boards useful when there is some data available from devices we connect. We will come back to this later. For now just hover your mouse over the vertical strip seen towards left side. The strip will expand and show various categories. Click on the icon for ‘Devices’ there.

Click on the ‘Device Types’ tab in the above screen. This shows the device types added to our platform. Since we didn’t add any device type so far, there will be nothing listed.

We will now add a new device type Raspberry Pi to our platform. Click on the “+Create Type” button. On the screen that pops up there will be two options – “Create Device Type” and “Create Gateway Type”. A gateway is something which can have devices connected to it. For e.g. a Raspberry Pi can act as a gateway and have multiple sensors or actuators connected to it as devices. We will create a device type instead of gateway type to keep things simple. Our objective is to send some data from Raspberry Pi and we are not going to need additional devices. So click on “Create device type”.
On the screens that appear, go on entering details for the device type. Remember that this is a device type we are creating and not an actual device. Only the field ‘Name’ is mandatory and rest all are optional. Let’s name the device as ‘Raspi-1B and add some description of the device type. Click on ‘Next’.

On the next screen is a template of the device to be created of this device type. These are the fields which will appear in every device you create later on. If you enter some values for these fields here, these values will become default values for new devices created later. Of course they can be changed from device to device as well. Remember that we are just creating a type of device and not actual device at this stage.


The next and last screen in creating device type gives a facility to add additional metadata about the device. You can add any additional fields you like which are not covered in the template. For now, just skip this and click on ‘Create’.

The device type will be created and you should see the screen similar to below. This shows the device type we just created and also shows that there are zero devices of this type. We are yet to create a devie of this type.

Create Device
Now that we have created a device type, we can add device to the platform. Click on ‘Browse’ in the above screen and then click on the button “+Add Device” on that screen. “Add Device” screen will pop up. Choose the device type we created and then click on ‘Next’. Do not click on the button “Create device type” as we have already created it.

As you can notice on the next screen the fields for device template appear with default values we added while creating device type. Other fields also appear here as empty fields and we can edit any of these fields. The device ID field is important here and needed later on. After entering all details, click on “Next”.

The next screen is for adding any additional metada for the device. If you had added some metadata while creating device type, it will appear here. You an also add more metadata per device. Skip this part and click on “Next”.

The next few screens are important to understand. Every device added to the platform gets assigned a token. It is based on this token that the device communicates with the platform. Think of the token as a password for the device. A token can be manually added or system generated. Preferred way is to have a system generated token as it can then be unique and complicated enough to maintain security. On the next screen it will give you an option to add your own token. We will let the system generate the token so skip this part and click on ‘Next’.

A summary screen will be presented which shows all summary of the device data we entered. Have a look and if any change is required, go back and edit the data. If everything is fine, click on “Add” to create the device. The device token is generated in next step.

The device is now created. This is an important screen. It shows the device credentials which are required later to communicate with the watson platform. Copy the credentials section and save it somewhere on your PC. It is always better to copy the credentials rather than typing them out. Scroll down this screen and you can see other sections. Since we do not yet have any data from the actual device, nothing substantial will be shown there.

After you have copied the device credentials, close this screen and it will return to the Devices screen. You will now see your device, its type and created date etc. here. It will also show the device status as disconnected (the warning icon towards left of the device ID). This is correct as we have not connected a physical device yet.

At this point, you have successfully created an IBM Bluemix account, started the Watson IoT Platform service on it and finally added a device to the Watson IoT platform. Next step is to get your Raspberry Pi running and sending data to the platform. I will cover that in part II of this series. Stay tuned !

great explanation….I have done some work in automation
LikeLike
Thanks ! Do share your work..
LikeLiked by 1 person
Sure may be after some time…
LikeLike